
- 1. The Role of the Beater Machine in an LDPE Washing Line
- 2. Why LDPE Film Is Especially Hard on Beater Machines
- 3. Comprehensive Malfunction Diagnosis Table (14 Fault Modes)
- 4. The Five-Step Layered Troubleshooting Method
- 5. Process Parameters and Their Coupling with Faults
- 6. Wear Parts and Spare Parts Management
- 7. Preventive Maintenance Plan
- 8. Upstream and Downstream Joint Troubleshooting
- 9. Polyretec LDPE Film Washing Line Configurations
- 10. Requirement to Model Selection Recommendation
- 11. Downstream Pelletizing Integration
- 12. Service and Support
- 13. Frequently Asked Questions
- 14. Conclusion
1. The Role of the Beater Machine in an LDPE Washing Line
Polyretec, a Wanplas factory, has supplied plastic recycling equipment since its origin in 2010 and today supports more than 100 recycling projects across 50-plus countries. Among the machines in a polyethylene film recovery plant, the beater machine is one of the most misunderstood and most frequently misdiagnosed. In this guide we explain exactly where the beater sits in an LDPE washing line, what it does, and how to troubleshoot it when it stops performing. If you operate an LDPE agriculture film or post-consumer packaging film line, the information below will help you restore throughput, lower moisture, and avoid unplanned downtime.
The beater machine is known in the industry by several names: squeezer-beater, film beater, and agitation washer. Whatever the name, its job is the same. It uses a high-speed rotating rotor fitted with beater blades to mechanically rub, scrub, and disperse wet film flakes inside a perforated drum. Positioned between crushing and hot washing, or between hot washing and dewatering, the beater performs three functions that no other single machine does as efficiently for thin film:
- De-agglomeration — film enters the line as wet, tangled clumps. The rotor breaks those clumps into individually moving flakes so that every surface can be cleaned.
- Dirt release — sand, soil, sticker glue, and organic residue are loosened by mechanical friction and turbulent water flow, then flushed out through the drum screen.
- Initial dewatering — centrifugal action throws free water outward through the screen, dropping the moisture of the discharged film from a high inlet level toward a lower outlet level.
In an LDPE line the beater is not optional. Without it, film flakes stay balled up, carry oversized contamination into the friction washer, and leave the dewatering stage too wet to pelletize. The table below lists the typical engineering parameters of an industrial beater used for LDPE film. Use it as a baseline when you compare your own machine nameplate against field reality.
| Parameter | Typical Range | Engineering Note |
|---|---|---|
| Rotor speed | 400 to 900 rpm | Higher speed increases friction and dewatering but also heat and wear. |
| Number of beater blades | 6 to 24 pieces | More blades improve dispersion at the cost of higher torque demand. |
| Drum diameter | 400 to 800 mm | Larger diameter raises capacity and residence time. |
| Length-to-diameter ratio (L/D) | 1.5 to 3.5 | Longer drum extends residence time for heavy contamination. |
| Drive power | 15 to 75 kW | Sized to material bulk density and target throughput. |
| Throughput | 500 to 2000 kg/h | Per-machine rating; line balance sets the real limit. |
| Inlet moisture | 40 to 70 percent | Film arrives wet from upstream washing. |
| Outlet moisture | 15 to 30 percent | Target before final dewatering and drying. |
| Screen hole size | 6 to 15 mm | Smaller holes retain more fiber but clog faster. |
Understanding these numbers matters because most beater faults show up first as a drift away from one of them. When outlet moisture climbs above 30 percent, when throughput drops below the rated floor, or when current exceeds the rated value by more than 10 percent, the machine is telling you something is wrong. The rest of this article teaches you how to read those signals correctly.
2. Why LDPE Film Is Especially Hard on Beater Machines
Low-density polyethylene film behaves differently from rigid bottle flakes, and that difference is why the beater is the component most likely to fail on an LDPE line. A troubleshooting plan that works for PET bottle washing will miss the real failure modes of film. The following material facts explain why.
LDPE film has an extremely large specific surface area relative to its mass. A single kilogram of agriculture film can unfold into several square meters. That surface area is what makes the material easy to clean in theory, but in practice it makes flakes tangle, wrap, and form wet balls that resist dispersion. Post-consumer agriculture film in particular arrives with 30 to 50 percent sand and soil by weight, plus straw, vine ties, and label backing that are not water-soluble and will not simply wash away.
Static electricity is a second problem. Dry or partly dry LDPE film builds static charge that makes flakes cling to the drum wall, to the rotor, and to each other. Charged film also attracts fine dust, so a line that should be cleaning film ends up re-contaminating it. The low melting point of LDPE, typically 105 to 115 degrees Celsius, is the third and most dangerous factor. The beater generates heat through friction. If water flow is low, if residence time is too long, or if the rotor is partially blocked, local temperature can approach the softening point and the film begins to melt, stick, and form hard agglomerates that can seize the rotor.
Finally, LDPE density is close to that of water. This makes sink-float separation ineffective for film and means the material floats in the wash tank, where it can bridge, raft, and feed unevenly into the beater. In the wet state film also holds together in clumps, so the beater must do real mechanical work just to open the feed before it can clean it. All of these behaviors converge on one conclusion: the beater on an LDPE line must be operated within a tighter window than on any rigid-flake line, and its maintenance must be more disciplined.
The single most common LDPE beater failure is not a broken part. It is the slow accumulation of wrapped film and compacted soil that raises current, raises temperature, and ultimately trips the drive. Catching that drift early is the whole game.
Operators sometimes assume that a film line can be run like a rigid-flake line with the same settings, and that assumption is the seed of most chronic beater trouble. A PET bottle line tolerates a partially clogged screen for a while; an LDPE line does not, because the film simply re-balls and the rotor torque climbs within minutes. Building a mental model of the film as a high-surface-area, low-melt, low-density, easily charged material is the first step to correct operation. Every adjustment that follows in this guide, from fill level and water ratio to temperature, gap, and speed, exists to keep that difficult material moving, clean, and cool. When the beater is treated as a precision agitation device rather than a simple spinner, availability rises and blade consumption falls.
3. Comprehensive Malfunction Diagnosis Table (14 Fault Modes)
This section is the core of the article. It lists 14 fault modes that Polyretec field engineers see most often on LDPE film beaters. For each mode we give the symptom you observe, the possible root causes, the inspection method to confirm the cause, the corrective action, and the prevention that stops it from returning. Work through this table before you replace any part, because many “broken” beaters are actually suffering from an upstream or process problem that a new blade will not fix.
| # | Symptom | Possible Root Cause | Inspection Method | Corrective Action | Prevention |
|---|---|---|---|---|---|
| 1 | Outlet moisture above 30 percent | Low rotor speed; clogged screen holes; insufficient water flow; overfilling above 80 percent | Check inverter output Hz, screen open area, pump pressure, and fill level | Restore speed, clear screen, raise water flow, reduce feed | Keep fill at 60 to 75 percent; weekly screen inspection |
| 2 | Throughput drops or machine chokes | Wet balling of film; oversized feed from crusher; screen blocked; rotor gap too tight | Inspect feed size, screen, and rotor for wrapped material | Stop feed, clear blockage, confirm crusher setting | Control crush size to 40 to 80 mm; avoid surge feeding |
| 3 | Main motor overload trip, current above 110 percent of rated | Mechanical jam; bearing seizure; voltage sag; rotor imbalance | Read drive log, measure supply voltage, rotate rotor by hand | Clear jam, replace bearing, correct supply, rebalance | Monthly current trend logging; balanced blade sets |
| 4 | Abnormal vibration above 7.1 mm/s RMS | Blade imbalance; loose foundation bolts; coupling misalignment; worn bearing | Use vibration meter on bearing housings; compare to ISO 10816 zones | Rebalance rotor, tighten bolts, realign coupling, replace bearing | Quarterly vibration survey; torque check on bolts |
| 5 | Bearing temperature above 75 degrees Celsius | Lubrication failure; seal leak letting water in; misalignment; overload | Infrared check, grease condition, shaft runout | Regrease or replace bearing, fix seal, realign | Weekly lubrication by schedule; seal inspection |
| 6 | Beater blade fracture or excessive wear | Abrasive sand; impact with metal; wrong material grade; unbalanced set | Measure wear depth against scrap threshold; check for foreign metal | Replace worn or broken blades as a matched set | Use Mn13 or hardfaced blades; install metal separation upstream |
| 7 | Drum screen holes blocked | Fine fiber packing; glue residue; low backwash; oversize contamination | Visual and pressure-drop check across screen | Open drum, pressure-wash screen, adjust backwash | Daily screen rinse; control glue-heavy feed |
| 8 | Material wraps the shaft | Rope, straw, label film, netting in feed | Inspect infeed for long flexible contaminants | Lock out, cut and remove wrap, install detangler | Pre-sort feed; add a rope extractor before the beater |
| 9 | Shaft seal leaks water into bearing | Seal worn; housing cracked; pressure too high | Dye or paper test at seal, check for emulsion in grease | Replace seal, repair housing, lower pressure | Quarterly seal replacement on schedule |
| 10 | Gearbox noise and oil leakage | Low oil; worn gear; failed seal; overload | Oil level, color, and sound check; leak trace | Top up or change oil, replace seal, inspect gears | Monthly oil check; avoid chronic overload |
| 11 | Material ejection and dust escape at outlet | Overfilling; broken splash guard; excessive speed; poor hood seal | Observe discharge, inspect guards and hood | Reduce fill, repair guard, reseat hood | Keep fill in range; inspect guards weekly |
| 12 | Belt slip or coupling misalignment | Loose belt; worn coupling block; misalignment beyond tolerance | Check belt tension, coupling gap, radial and angular error | Retension belt, replace elastic block, realign | Keep radial under 0.05 mm, angular under 0.05 mm per 100 mm |
| 13 | Material melts and forms hard agglomerates | Friction heat runaway; low water; long residence; blocked screen | Measure drum temperature, water flow, residence time | Stop, cool, clear melted mass, restore water flow | Wash water below 60 degrees Celsius; monitor temperature |
| 14 | Inverter fault codes (overcurrent, overvoltage, undervoltage, overheat) | Supply fault; motor fault; cooling blocked; load spike | Read fault category, check supply, motor, and cooling fan | Clear category cause, reset, test under load | Clean inverter cooling; log fault history |
The vibration criterion in row 4 uses the ISO 10816 evaluation zones as a field reference: zone A is good, zone B is acceptable for permanent operation, zone C requires attention, and zone D is unacceptable. A reading above 7.1 mm/s RMS on a bearing housing generally falls into zone D for this class of machine and should trigger immediate investigation rather than continued running.
4. The Five-Step Layered Troubleshooting Method
Random part swapping wastes money and hides the real cause. Polyretec engineers use a repeatable five-step method that moves from safe isolation to confirmed root cause. Apply it in order; do not skip steps.
Step 1 — Safe isolation and lockout (LOTO). Before touching the machine, isolate energy: lock out the main disconnect, lock out the inverter, depressurize the water line, and tag the lock with your name. Confirm zero energy by attempting a controlled start that should fail. No inspection of the rotor, screen, or seals is safe without LOTO.
Step 2 — Reproduce the phenomenon and collect data. Record what the machine was doing when it failed: throughput, inlet and outlet moisture, current draw, bearing temperature, vibration, water pressure, and wash temperature. Reproduce the fault only if it is safe to do so, and capture the same data during the failure so you can compare against the healthy baseline from the parameter table in section 1.
Step 3 — Layered inspection from outside in. Work through layers in this order: process parameters first, then material condition, then mechanical condition, then electrical condition. Nine times out of ten the fault is in process or material, not in a broken component. Check fill level, water flow, and feed size before you open the gearbox.
Step 4 — Confirm and verify the root cause. Propose one cause, test it, and confirm the symptom disappears. If it returns, you have a contributing factor and must keep digging. Verification means running the machine under load for a full production hour and seeing stable current, temperature, and moisture.
Step 5 — Record and prevent. Write the failure, cause, fix, and preventive action into the maintenance log. Trend the data so the next occurrence is caught earlier. A good log turns every breakdown into a future prevention.
The table below compresses this method into a 30-minute on-site decision flow you can post next to the control panel.
| Time | Action | Decision Point | Go To |
|---|---|---|---|
| 0 to 5 min | LOTO, read drive log and gauges | Is current or temperature in alarm? | If yes, jump to electrical/mechanical layer |
| 5 to 10 min | Check fill level, water pressure, wash temp | Fill over 80 percent or water low? | If yes, fix process, re-run |
| 10 to 15 min | Inspect feed size and contamination | Crusher output oversized or rope present? | If yes, fix upstream, clear wrap |
| 15 to 20 min | Open drum, check screen and blade gap | Screen clogged or gap wrong? | If yes, clean or adjust |
| 20 to 25 min | Check bearing temp, vibration, coupling | Vibration over 7.1 or temp over 75 C? | If yes, mechanical repair |
| 25 to 30 min | Verify under load, log result | Stable for one hour? | If no, repeat from step 3 |
5. Process Parameters and Their Coupling with Faults
Most beater faults are the visible result of a process parameter drifting out of its window. The table below couples each controllable parameter to the fault it tends to cause and the healthy setpoint for LDPE film. Treat this as the operating envelope of the machine.
| Parameter | Recommended Setpoint (LDPE) | Coupled Fault When Out of Range |
|---|---|---|
| Fill level (loading rate) | 60 to 75 percent of drum volume | Below 60 percent: poor rubbing, low throughput. Above 75 percent: choke, high moisture, overload. |
| Upstream crush size | 40 to 80 mm for film | Oversized pieces ball up and jam the rotor; undersized fines pack the screen. |
| Wash water temperature | Below 60 degrees Celsius | Above 60 degrees Celsius: LDPE softens, melts, and forms agglomerates (fault 13). |
| Water-to-material ratio | 1 to 6 up to 1 to 12 | Too low: poor dirt release and heat buildup. Too high: pump overload and splash loss. |
| Residence time | 15 to 45 seconds | Too short: incomplete cleaning. Too long: heat buildup and re-tangling. |
| Blade gap | 3 to 8 mm | Too tight: high torque and blade wear. Too wide: poor dispersion and high moisture. |
| Rotor speed vs gap match | Higher speed pairs with wider gap | Mismatch raises current and vibration without improving output. |
The relationship between blade gap and rotor speed deserves emphasis. A narrow gap at high speed is the fastest route to a broken blade and an overloaded drive. When you raise speed to recover throughput, widen the gap first; when you tighten the gap for finer cleaning, lower the speed. This single rule prevents a large share of the overload and fracture cases in section 3.
Residence time is controlled less by a timer than by the balance between feed rate and rotor action. If you increase feed to raise throughput, residence time drops and cleaning suffers unless you also widen the blade gap or raise speed within the allowed envelope. The practical rule is to set feed to hold fill at 60 to 75 percent, then tune gap and speed to keep outlet moisture at the 15 to 30 percent target. Chasing throughput by overfilling is the most common cause of the choke and high-moisture faults, and it is entirely avoidable with disciplined setpoint control. A well-tuned line holds its window for weeks; a line driven by feed-rate alone drifts into alarms within a single shift.
6. Wear Parts and Spare Parts Management
The beater has a short list of wear parts that decide its reliability. Stocking the right ones at the right level keeps a minor wear event from becoming a multi-day stoppage. The table below lists each wear part, its typical life, the recommended stock level, and the scrap criterion that tells you when to replace rather than repair.
| Wear Part | Material / Type | Typical Life (hours) | Stock Level | Scrap Criterion |
|---|---|---|---|---|
| Beater blade | Mn13 high-manganese steel, hardfaced, or composite wear steel | 1500 to 4000 | High | Wear depth past 30 percent of original, or any crack or fracture |
| Drum screen plate | Perforated wear plate, 6 to 15 mm holes | 2000 to 5000 | Medium | Hole deformation or open-area loss over 20 percent |
| Rolling bearing | Sealed spherical or cylindrical roller | 8000 to 20000 | High | Temperature over 75 C, vibration over 7.1 mm/s, or pitting |
| Shaft seal | Mechanical or lip seal | 3000 to 6000 | Medium | Any water trace into bearing housing |
| Drive belt | V or synchronous belt | 4000 to 8000 | Medium | Cracks, glazing, or slip under load |
| Coupling elastic block | Polymer insert | 5000 to 10000 | Low | Deformation, radial error over 0.05 mm, or angular over 0.05 mm per 100 mm |
Blades should always be replaced as a balanced set, never one at a time. A single new blade among worn ones creates imbalance that shows up as vibration and premature bearing failure. Keep at least one full set of blades and one spare screen in stock for a line running two shifts, because these are the parts most likely to fail without warning on contaminated LDPE feed.
7. Preventive Maintenance Plan
Reactive repair is expensive. A disciplined preventive plan turns the fault table in section 3 into a checklist that catches problems while they are still cheap. The schedule below separates tasks by interval and lists the measured value you should record each time.
| Interval | Task | Recorded Value | Action Threshold |
|---|---|---|---|
| Each shift | Visual check of guards, infeed, and discharge | Fill level, obvious leaks | Correct fill, stop leaks |
| Daily | Screen rinse, belt tension, grease points | Current, outlet moisture | Moisture over 30 percent, slip |
| Weekly | Lubrication, seal check, blade gap measure | Bearing temperature, gap mm | Temp over 75 C, gap outside 3 to 8 mm |
| Monthly | Current trend, oil level, coupling alignment | Current percent of rated, radial error | Current over 110 percent, error over 0.05 mm |
| Quarterly | Vibration survey, blade wear measure, seal swap | Vibration mm/s RMS, wear depth | Vibration over 7.1, wear past 30 percent |
Use a simple logbook with one row per inspection and columns for date, operator, vibration, bearing temperature, motor current, outlet moisture, and blade wear. Over a year this record becomes the most valuable troubleshooting tool you own, because it shows the drift that precedes every failure. Polyretec supplies a paper and digital log template with each line and can review your trend data during remote support sessions.
8. Upstream and Downstream Joint Troubleshooting
A hard truth in film recycling is that many beater problems are not caused by the beater. The machine is the most visible point of failure, so it gets blamed, but the real root cause often sits upstream or downstream. Before you rebuild the rotor, check the neighbors. The table below maps surface symptoms seen at the beater to the true root cause located at other points in the line.
| Surface Symptom at Beater | True Root Cause at Other Stages | Where to Fix |
|---|---|---|
| Choke and low throughput | Crusher set too coarse, film arrives in sheets | Upstream crusher gap and speed |
| High sand in discharge | Sand removal stage ineffective or bypassed | Upstream de-sanding and rinse |
| High outlet moisture | Wash water pump flow below spec | Upstream water system and pump |
| Film re-balls after beater | Downstream dewatering clogged, material回流 | Downstream centrifuge or dryer |
| Excess fine fiber on screen | Shredder producing too much fines | Upstream shredder screen size |
| Repeated blade impact damage | No metal separation before the beater | Upstream metal separator |
The lesson is to trace every symptom one full loop around the line before committing to a repair. A beater that is rebuilt but still fed oversized sheets from a mis-set crusher will fail again within a week. Polyretec commissioning engineers always tune the whole line as one system, because the beater only performs as well as the material it receives.
9. Polyretec LDPE Film Washing Line Configurations
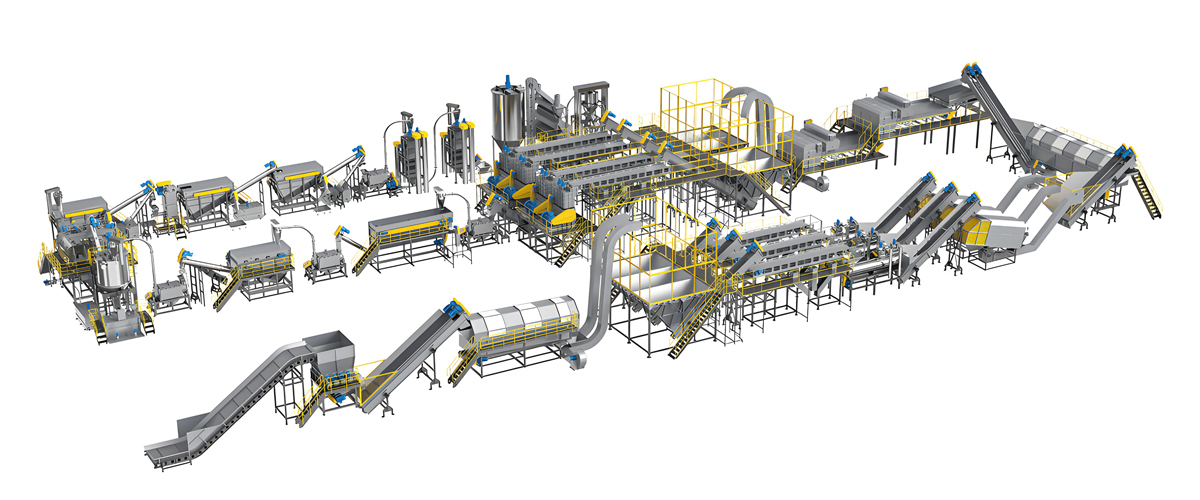
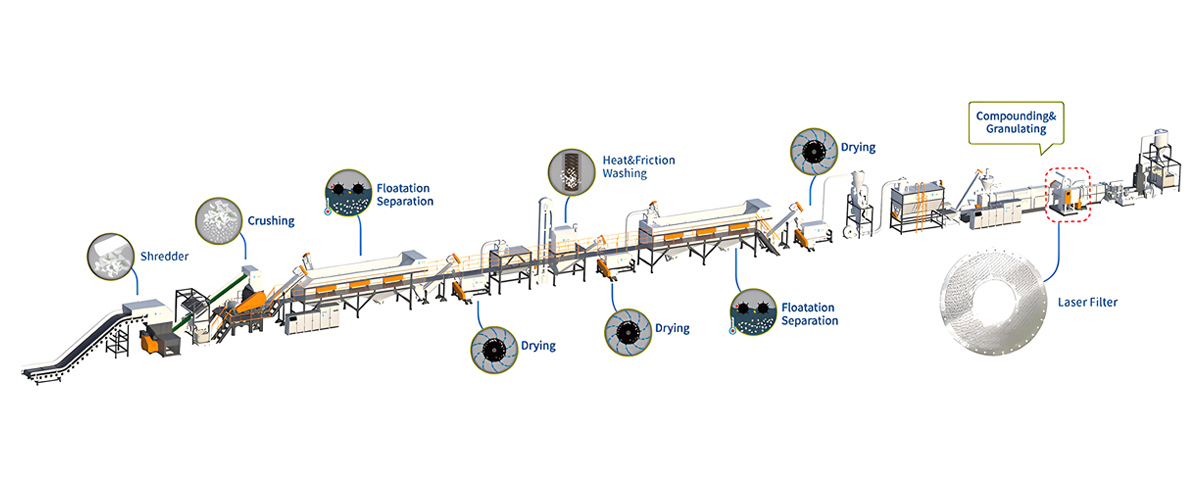
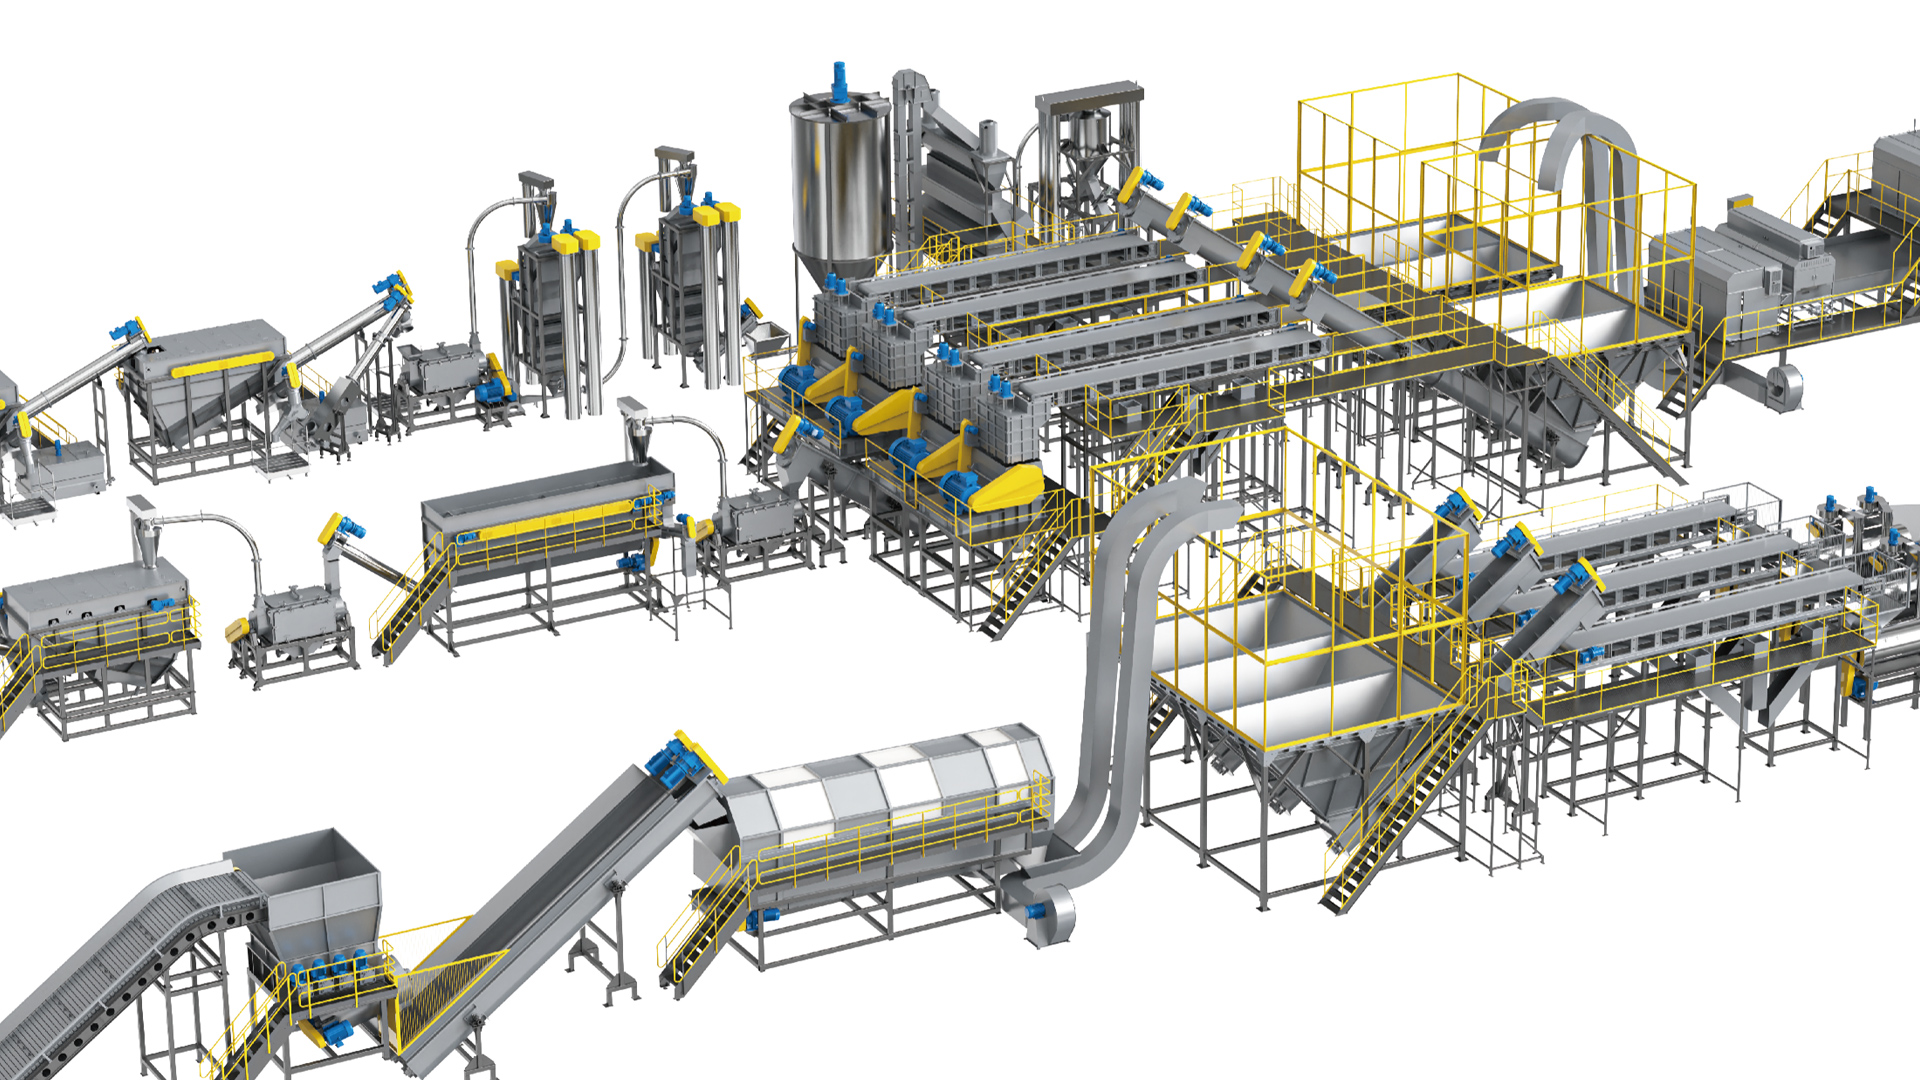
Polyretec designs LDPE film washing lines around the beater as the central agitation and dewatering stage. Two configurations are commonly supplied, and both are built to the same process envelope described above. The specifications below are typical of the Polyretec range and scale with the capacity tier you select.
Polyretec LDPE Film Washing Line (beater-integrated)
This configuration targets heavily contaminated LDPE agriculture film and post-consumer packaging film with stickers, soil, and plant residue. It places a heavy-duty beater between hot washing and dewatering, exactly where the material needs the most aggressive mechanical action. The Mexico reference project for LDPE film with stickers used this layout with a heavy-duty shredder feeding the beater.
| Specification | Value |
|---|---|
| Capacity | 500 / 800 / 1500 kg/h tiers |
| Installed power | 110 / 140 / 180 kW (line total) |
| Water consumption | 2.0 / 3.0 / 4.0 t/h (recyclable in closed loop) |
| Footprint | 35 / 45 / 60 square meters |
| Process stages | 7 to 9: shredding, pre-soak wash, hot wash, beater agitation, friction wash, rinsing, dewatering, drying, optional pelletizing |
| Suitable materials | LDPE agriculture film, LDPE packaging film, printed LDPE film, LDPE stretch film |
| Outlet moisture | 15 to 30 percent after beater and dewatering |
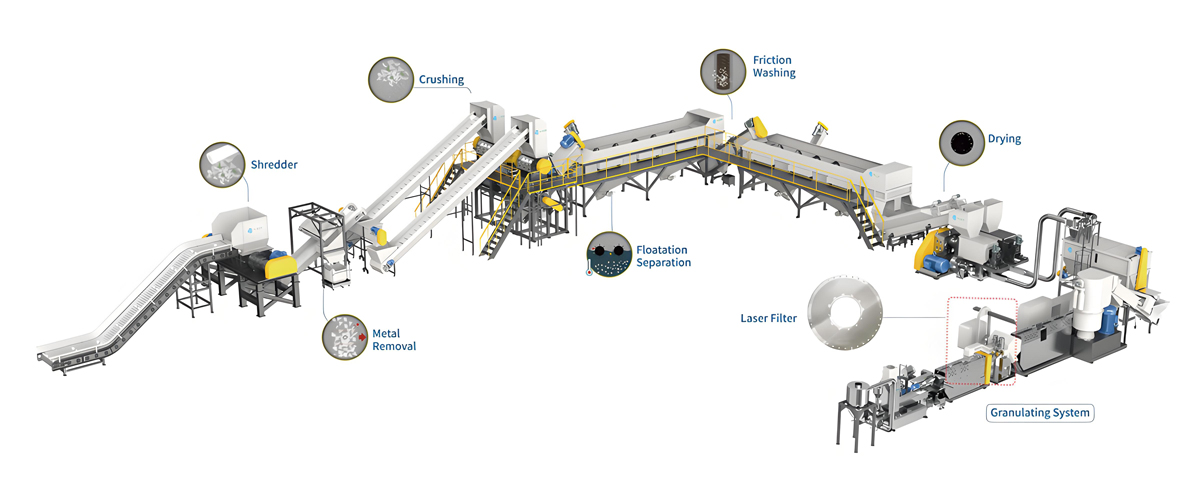
Polyretec PP/PE Soft Film Crushing and Washing Line
For softer post-consumer film mixes, including woven bags, agriculture film, and non-woven, Polyretec supplies a fully automated film washing line in the PTW-class range. The Taiwan reference project used a fully automated PP PE film washing machine of this type. It integrates crushing, washing, and beater agitation in one balanced train and is available across the same capacity tiers.
| Specification | Value |
|---|---|
| Capacity | 500 / 1000 / 1500 kg/h tiers |
| Installed power | 95 / 130 / 170 kW (line total) |
| Water consumption | 1.8 / 2.8 / 3.8 t/h (recyclable in closed loop) |
| Footprint | 30 / 42 / 55 square meters |
| Process stages | 6 to 8: crushing, wash, beater agitation, friction wash, rinsing, dewatering, drying |
| Suitable materials | PP and PE film, woven bags, agriculture film, PP non-woven |
| Outlet moisture | 15 to 30 percent after beater and dewatering |
Both configurations are supplied as part of the Wanplas group commitment to cost-effective recycling equipment that does not compromise on quality. Each line is tested before shipment and can be matched to a specific contamination profile during a sample wash at the Polyretec factory.
10. Requirement to Model Selection Recommendation
Choosing the right line starts with the feed, not with the machine. The table below maps common LDPE film situations to a recommended Polyretec configuration and beater specification. Use it as a first cut, then confirm with a sample wash.
| Incoming Material | Sand or Soil Content | Target Capacity | Recommended Configuration | Beater Specification |
|---|---|---|---|---|
| Clean LDPE packaging film | Under 10 percent | 500 to 800 kg/h | PP/PE Soft Film Washing Line | 15 to 37 kW, 400 to 600 mm drum |
| LDPE agriculture film | 30 to 50 percent | 800 to 1500 kg/h | LDPE Film Washing Line (beater-integrated) | 37 to 75 kW, 600 to 800 mm drum |
| Printed LDPE with stickers | 10 to 30 percent | 500 to 1500 kg/h | LDPE Film Washing Line, heavy-duty beater | 55 to 75 kW, 800 mm drum, hardfaced blades |
| Mixed PP/PE film and woven bags | 10 to 30 percent | 1000 to 1500 kg/h | PP/PE Soft Film Washing Line (PTW class) | 37 to 55 kW, 600 to 800 mm drum |
| PP non-woven and TPE gloves | Under 15 percent | 500 to 1000 kg/h | PP/PE Soft Film Washing Line | 22 to 45 kW, 500 to 700 mm drum |
If your feed is outside these bands, for example extremely high sticker load or co-mingled rigid and film, send a sample to Polyretec for a wash trial. The trial sets the real beater size, screen hole, and water ratio far more reliably than any desk calculation.
11. Downstream Pelletizing Integration
Once the beater and the rest of the washing line have delivered clean LDPE film at 15 to 30 percent moisture, the material is ready for pelletizing. For downstream pelletizing, Wanplas supplies matched pelletizing systems that integrate directly with Polyretec LDPE washing lines. These systems accept the washed and dewatered film and convert it into reusable pellets without a separate re-drying step in most configurations, because the Wanplas pelletizing train is engineered to pair with the moisture profile that Polyretec washing lines produce. The integration is delivered as a single coordinated package, so the transfer point between washing and pelletizing is designed up front rather than improvised on site.
12. Service and Support
Polyretec, as a Wanplas factory, backs every line with the group’s shared service promises. These are not marketing phrases; they are written into the supply agreement and applied to the beater and the whole washing train.
- Test before shipment. Each line is run on representative material at the factory and the beater performance is verified against the parameter table in section 1 before it leaves.
- Sample wash trial. Send your actual feed and Polyretec will wash it on the target line, so you see real outlet moisture and throughput before you commit.
- Installation and commissioning. Engineers travel to site to install, align, and tune the line as one system, including the beater gap and speed match described in section 5.
- Spare parts policy. The Wanplas group provides USD 500 free parts every year, plus warranty replacement of damaged parts within the warranty period.
- Training. Operators receive hands-on training in LOTO, the five-step method, and the preventive plan in section 7, so your team can run the line without depending on external calls for routine faults.
- Remote operation and fault diagnosis. With the control system connected, Polyretec engineers can read drive logs, current trends, and fault codes remotely and guide you through the 30-minute decision flow in section 4.
- Open factory. Customers are welcome to visit the Polyretec factory to inspect manufacturing, run a sample, and audit quality before delivery.
The remote diagnosis capability is especially valuable for beater faults, because most alarms are process or electrical and can be cleared by following the fault-code logic in row 14 of the diagnosis table while an engineer watches the live data. This turns a potential two-day wait for a site visit into a same-day recovery.
13. Frequently Asked Questions
Why does my LDPE beater keep tripping the drive even after I replaced the blades?
A trip is rarely caused by the blades themselves. In LDPE service the usual cause is wrapped film, compacted soil, or an upstream feed problem that raises torque. Follow the five-step method in section 4, check fill level and feed size first, and only then open the rotor. Replacing blades without fixing the process window will repeat the trip within days.
What outlet moisture should I expect from a healthy beater?
For LDPE film a healthy beater discharges at 15 to 30 percent moisture before final dewatering and drying. If you measure above 30 percent, check rotor speed, screen open area, water flow, and fill level against the setpoints in section 5. Moisture above 30 percent also points downstream, because a clogged dewatering stage will show the same symptom at the beater.
How often should I replace the beater blades?
Blade life is 1500 to 4000 hours depending on contamination and material grade. Replace the full set when wear depth passes 30 percent of the original, or immediately on any crack or fracture. Always replace as a balanced set to avoid the vibration and bearing damage described in fault modes 4 and 6.
Is high vibration always a bearing problem?
No. Vibration above 7.1 mm/s RMS more often comes from blade imbalance, loose foundation bolts, or coupling misalignment. Bearings are only one of three mechanical causes, and process imbalance such as overfilling can also raise vibration. Use the layered method and measure at the bearing housings before replacing the bearing.
Can I run the wash water hotter to clean stickers better?
Do not exceed 60 degrees Celsius for LDPE. Above that, the film softens and can melt and agglomerate inside the beater, which is fault mode 13 and one of the most damaging failures. Better sticker removal comes from longer residence within the 15 to 45 second window and stronger mechanical action, not from higher temperature.
My beater looks fine but the washed film is still sandy. What is wrong?
The beater is probably not the cause. High residual sand usually means the upstream de-sanding or rinse stage is ineffective or bypassed, or the wash water pump is below spec. Trace the symptom around the line using the upstream and downstream table in section 8 before rebuilding the rotor.
How do I connect the washing line to pelletizing?
After washing and dewatering, the LDPE film proceeds to pelletizing. Wanplas supplies matched pelletizing systems that integrate directly with Polyretec LDPE washing lines, delivered as one coordinated package so the transfer point is designed during engineering rather than added later.
14. Conclusion
The beater machine is the heart of an LDPE film washing line, and most of its failures are process and material problems wearing a mechanical disguise. By holding fill at 60 to 75 percent, keeping wash water below 60 degrees Celsius, matching blade gap to rotor speed, and following the five-step layered method, you will prevent the large majority of the 14 fault modes in this guide. When something does go wrong, the diagnosis table and the 30-minute decision flow get you back to stable output fast, and the preventive plan turns every breakdown into future protection.
Polyretec, a Wanplas factory with more than 100 recycling projects across 50-plus countries, builds LDPE film washing lines around a heavy-duty beater engineered for exactly the contamination profiles described here. Send us your material specification and a sample, and our engineers will run a wash trial, recommend the right configuration from the selection table, and deliver a line tested before shipment with the Wanplas group’s USD 500 free parts per year policy and remote fault diagnosis. Visit the Polyretec factory to see the line running, confirm quality, and plan your installation with our commissioning team.